
Your study table is more than just a place to sit—it’s where ideas flow, goals get tackled, and focus happens. And let’s be honest, a cluttered desk can mess with your mood. The good news? You don’t need a total makeover. Just the right stationery organiser and a few simple tools can make your desk feel like your own little productivity zone.
Let’s break it down step by step and get that desk looking (and feeling) better than ever.
Why a Tidy Desk Just Feels Better
It Helps You Focus
Ever try working at a messy desk? It’s distracting. When your space is neat and your stationery organiser is doing its job, it’s way easier to stay in the zone.
It Saves You Time (and Stress)
No more digging through drawers or shuffling piles to find a pen. When your office stationery has a proper place, everything’s right where you need it.
What You’ll Need to Get Started
A Desk and Chair That Work for You
Pick a table that fits your space and a comfy chair that supports your back. You don’t need anything fancy—just something that feels good to sit at.
Good Lighting
Natural light is amazing if you have it. If not, grab a small desk lamp. A well-lit space keeps you alert and protects your eyes.
Your Everyday Stationery
You don’t need a full supply closet—just the basics:
- A few good pens and pencils
- Highlighters and sticky notes
- A notepad or notebook
- Scissors, tape, a glue stick
- Clips, a stapler, and a ruler
All of this should fit nicely into your stationery organiser.
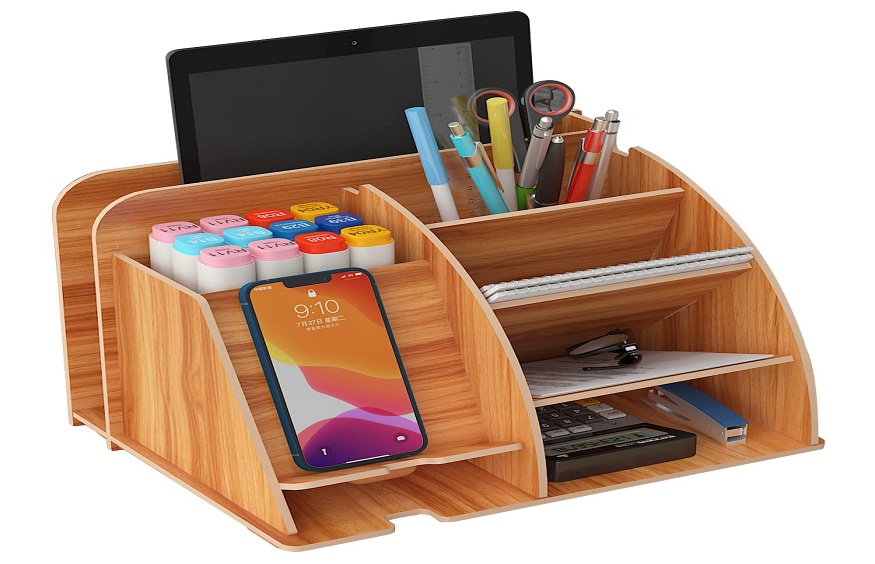
Finding the Right Stationery Organiser for You
Different Styles, Same Purpose
There are tons of stationery organisers out there:
- Drawer organisers for stashing the small stuff
- Desktop caddies for easy grab-and-go access
- Trays for papers and folders
- Wall organisers to save table space
Material Choices
- Plastic is affordable and colorful
- Wood adds a natural, warm vibe
- Metal is modern and super sturdy
Pick what matches your style (and your budget).
Keep Size in Mind
Small desk? Go vertical or compact. Big desk? Spread out with a multi-section study table organiser.
How to Set Up Your Study Table (Without the Stress)
Step 1: Clear Everything Off
Start fresh. Take everything off your desk, give it a quick wipe, and only put back what you actually use.
Step 2: Sort Your Supplies
Group your stuff—pens with pens, paper with paper. You’ll see what you use most and what can go.
Step 3: Load Up Your Stationery Organiser
Place your stationery organiser where it’s easy to reach. Keep your go-to tools (like pens and notes) in the front or top.
Step 4: Add Some Personality
This is your space! Add a little plant, your favorite photo, or a calendar you’ll actually look at.
Tips to Keep Your Desk Looking Good
Do a Quick Weekly Tidy
Take 5 minutes once a week to put everything back in place. It makes a big difference.
Use Labels or Small Boxes
Label different sections or use mini containers inside your desk organiser to keep things from getting messy again.
Final Thoughts
Setting up a clean and comfy study space doesn’t have to be a big project. With the right stationery organiser and a few everyday office stationery items, you can turn any desk into a space you actually want to use.
A little effort goes a long way—your future self will thank you every time you sit down to work.
FAQs
What’s the best organiser for a small desk?
Try a vertical or wall-mounted organiser. It gives you more space without crowding your desk.
What stationery should students always have?
Pens, notebooks, highlighters, sticky notes, a ruler, and a simple study table organiser should cover it.
Will organizing my desk really help me work better?
Yes! A tidy space means fewer distractions, which helps you focus and get things done faster.
Where can I buy good stationery organisers and supplies?
Check out Amazon, Flipkart, or your local stationery shop—they usually have great options.